Integrating Stripe Payments into a Next.js Application
Taking payments is one of those features where the happy path is easy and the edge cases are where money goes missing. A customer closes the tab before the success page loads. A webhook arrives twice. Someone edits the price in their browser's dev tools. A card needs 3D Secure and the payment completes minutes later.
Stripe handles the card-processing side, and Next.js gives you the two server primitives you need to integrate it properly: Server Actions to start a payment and Route Handlers to receive Stripe's webhooks. This post walks through a complete one-time payment flow with Stripe Checkout, then extends it to subscriptions with the customer portal.
I'll cover choosing an integration style, setting up the SDK, creating Checkout Sessions from a Server Action, verifying webhooks, fulfilling orders idempotently, showing a success page, testing locally with the Stripe CLI, and the security details that matter.
Choosing an Integration Style
Stripe offers several ways to collect payment. For a Next.js app, these are the realistic options:
| Approach | Where the payment form lives | Effort | Good for |
|---|---|---|---|
| Payment Links | Stripe-hosted, created in the dashboard | Minimal, no code | Simple products, quick launches |
| Checkout (hosted) | Stripe-hosted page, created via API | Low | Most stores and SaaS signups |
| Checkout (embedded) | Stripe's form embedded in your page | Low to medium | Keeping users on your domain |
| Payment Element + Payment Intents | Your own page with Stripe's UI components | Medium to high | Fully custom checkout flows |
This guide uses hosted Checkout. It handles card validation, wallets like Apple Pay and Google Pay, local payment methods, tax and discount codes, 3D Secure, and receipts, and it keeps card data entirely off your servers, which keeps your PCI scope small. The server-side pieces (sessions, webhooks, fulfillment) are the same shape for the other approaches, so the rest of this post still applies if you switch later.
Installing and Configuring Stripe
npm install stripe
Grab your test-mode keys from the Stripe dashboard and add them to .env.local:
# .env.local
STRIPE_SECRET_KEY="sk_test_..."
STRIPE_WEBHOOK_SECRET="whsec_..."
NEXT_PUBLIC_SITE_URL="http://localhost:3000"
The secret key and webhook secret have no NEXT_PUBLIC_ prefix, so Next.js never includes them in browser bundles. Hosted Checkout doesn't need the publishable key at all, because the browser never talks to Stripe directly; it just gets redirected.
Create a single server-side Stripe client:
// src/lib/stripe.ts
import "server-only";
import Stripe from "stripe";

export const stripe = new Stripe(process.env.STRIPE_SECRET_KEY!);
The server-only import guarantees a build error if a Client Component ever imports this file. Each version of the stripe package is pinned to a specific API version by default, so upgrading the package is how you move to a newer API. Read Stripe's changelog when you do.
Defining Products on the Server
In the dashboard, create a product and a price, then copy the price ID (it starts with price_). Keep a server-side map of what you sell:
// src/lib/catalog.ts
import "server-only";

export const catalog = {
  "starter-kit": { name: "Starter Kit", priceId: "price_123abc" },
  "pro-kit": { name: "Pro Kit", priceId: "price_456def" },
} as const;

export type ProductKey = keyof typeof catalog;

export function isProductKey(value: string): value is ProductKey {
  return value in catalog;
}
The point of this file is that prices never come from the client. The browser sends a product key; the server decides the Stripe price. If you passed an amount from a form field, anyone could change it to one cent.
Creating a Checkout Session in a Server Action
When the customer clicks "Buy", a Server Action creates a Checkout Session and redirects to Stripe's hosted page.
// src/app/checkout/actions.ts
"use server";

import { redirect } from "next/navigation";
import { stripe } from "@/lib/stripe";
import { catalog, isProductKey } from "@/lib/catalog";
import { getCurrentUser } from "@/lib/auth";

export async function startCheckout(formData: FormData) {
  const productKey = String(formData.get("product") ?? "");
  if (!isProductKey(productKey)) {
    throw new Error("Unknown product");
  }

  const user = await getCurrentUser();
  const siteUrl = process.env.NEXT_PUBLIC_SITE_URL!;

  const session = await stripe.checkout.sessions.create({
    mode: "payment",
    line_items: [{ price: catalog[productKey].priceId, quantity: 1 }],
    customer_email: user?.email,
    client_reference_id: user?.id,
    metadata: { productKey },
    success_url: `${siteUrl}/checkout/success?session_id={CHECKOUT_SESSION_ID}`,
    cancel_url: `${siteUrl}/pricing`,
  });

  if (!session.url) throw new Error("Stripe did not return a Checkout URL");

  redirect(session.url);
}
Key details:
mode: "payment"is a one-time charge. You'll see"subscription"later.line_itemsreferences your Stripe price by ID, so the amount and currency are defined in Stripe, not in your code.customer_emailpre-fills the email field.client_reference_idattaches your internal user ID to the session so the webhook can tie the payment back to an account.metadatais a free-form key/value store that comes back in webhooks. It's useful for anything your fulfillment logic needs.{CHECKOUT_SESSION_ID}insuccess_urlis a literal placeholder. Stripe replaces it with the real session ID when redirecting back.redirect()fromnext/navigationworks in Server Actions and sends the browser to the external Stripe URL. Call it outside anytry/catch, because it works by throwing.
getCurrentUser stands in for your auth library. Whether you require sign-in before purchase is a product decision; the code handles both.
The button is a plain form, so it works before JavaScript loads:
// src/app/pricing/page.tsx
import { startCheckout } from "../checkout/actions";

export default function PricingPage() {
  return (
    <main>
      <h1>Pricing</h1>
      <form action={startCheckout}>
        <input type="hidden" name="product" value="starter-kit" />
        <button type="submit">Buy Starter Kit</button>
      </form>
      <form action={startCheckout}>
        <input type="hidden" name="product" value="pro-kit" />
        <button type="submit">Buy Pro Kit</button>
      </form>
    </main>
  );
}
Why the Success Page Isn't Enough
It's tempting to fulfill the order on the success page: the customer lands there after paying, so mark the order paid and send the download link. Don't rely on that alone. Customers close the tab, lose their connection, or pay with a method that confirms minutes later. Some never reach the success page at all.
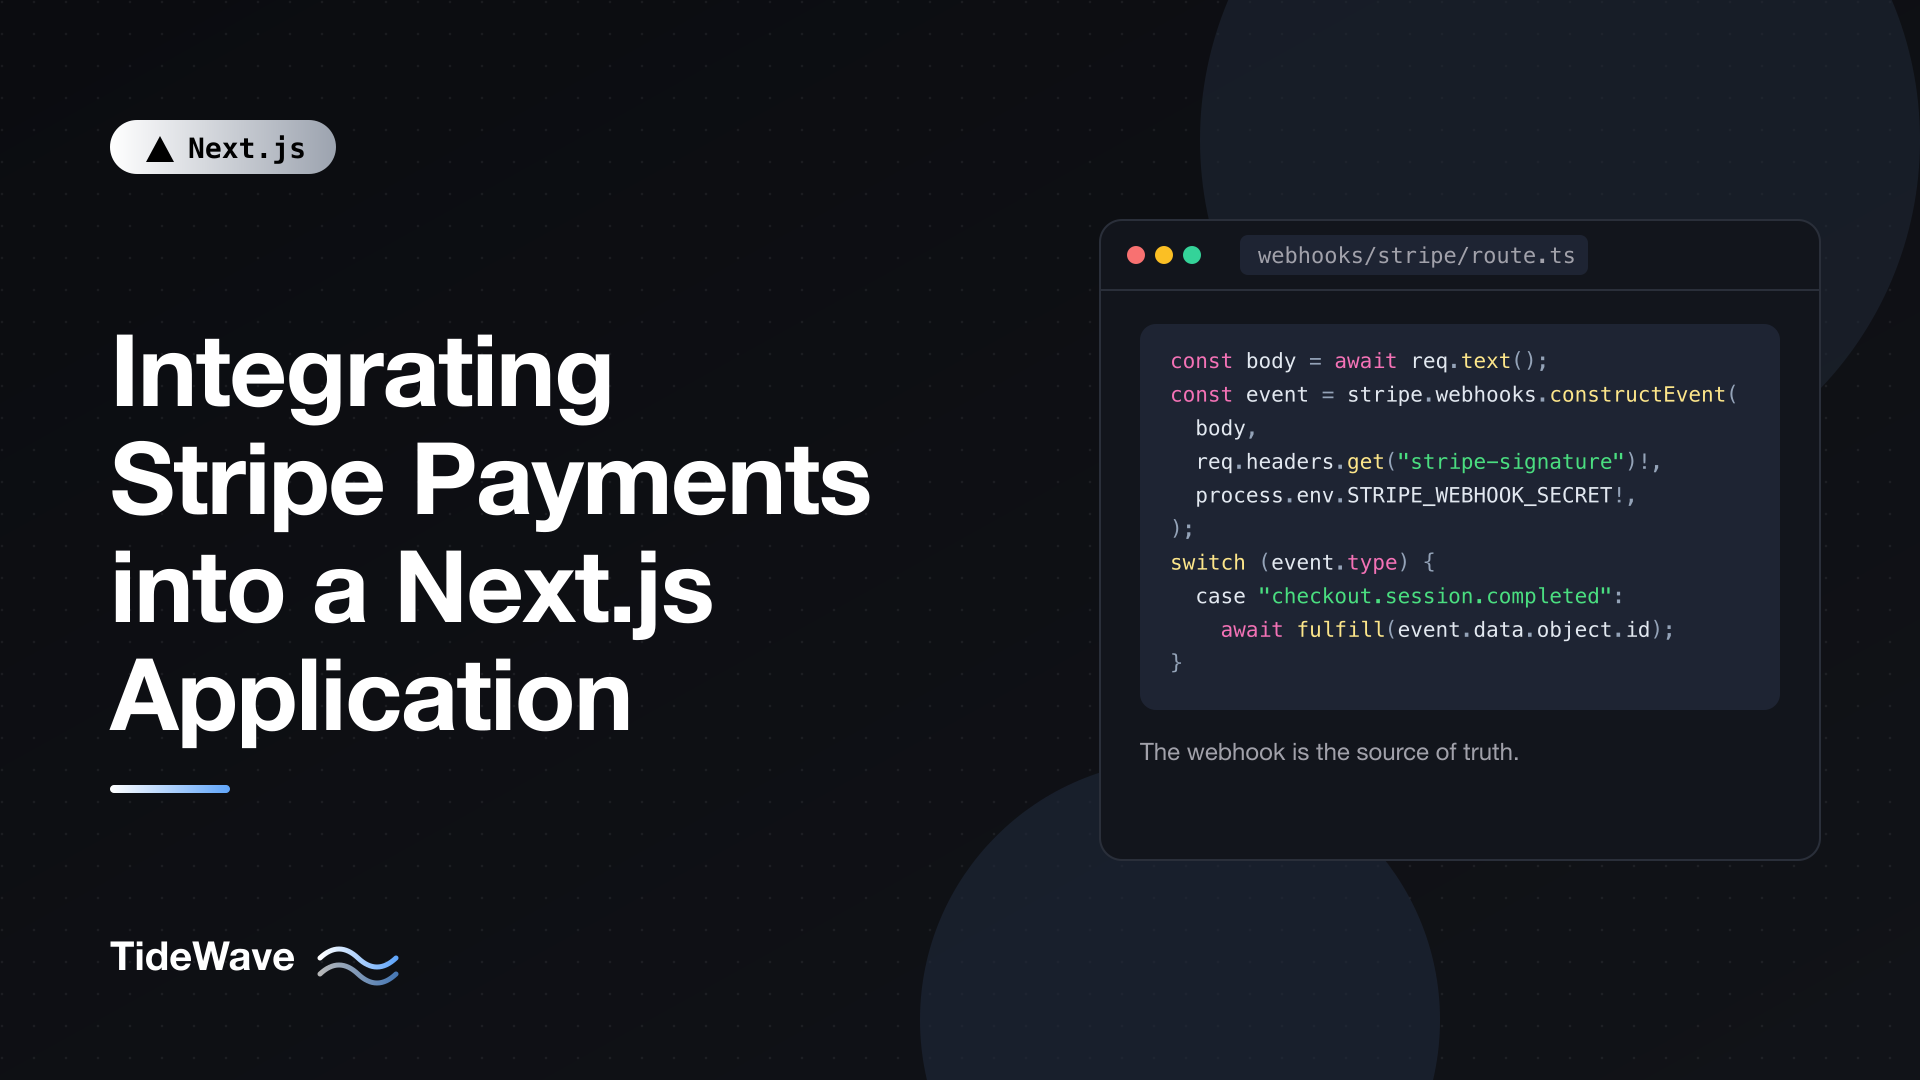
Stripe's answer is webhooks: Stripe sends an HTTP request to your server when something happens, and retries if your server doesn't respond with a 2xx. The webhook is the source of truth for fulfillment. The success page is just a nice confirmation screen.
Handling Webhooks in a Route Handler
Create a Route Handler for Stripe to call:
// src/app/api/webhooks/stripe/route.ts
import type Stripe from "stripe";
import { stripe } from "@/lib/stripe";
import { fulfillCheckout } from "@/lib/fulfillment";

export async function POST(request: Request) {
  const body = await request.text();
  const signature = request.headers.get("stripe-signature");

  if (!signature) {
    return new Response("Missing signature", { status: 400 });
  }

  let event: Stripe.Event;
  try {
    event = stripe.webhooks.constructEvent(
      body,
      signature,
      process.env.STRIPE_WEBHOOK_SECRET!,
    );
  } catch (error) {
    console.error("Webhook signature verification failed", error);
    return new Response("Invalid signature", { status: 400 });
  }

  switch (event.type) {
    case "checkout.session.completed":
    case "checkout.session.async_payment_succeeded":
      await fulfillCheckout(event.data.object.id);
      break;
    case "checkout.session.async_payment_failed":
      // Notify the customer that their payment didn't go through.
      break;
    default:
      // Ignore events you haven't subscribed to handling.
      break;
  }

  return Response.json({ received: true });
}
The details here are what make it secure:
- Read the raw body with
request.text(). Stripe signs the exact bytes it sent. If you parse JSON first and re-serialize it, the signature check fails. - Verify every request with
constructEvent. The webhook URL is public. Without verification, anyone could POST a fake "payment succeeded" event. The webhook secret proves the request came from Stripe and hasn't been altered, and the signature includes a timestamp that guards against replayed requests. - Return 400 on bad signatures and a 2xx once you've handled the event. If fulfillment throws, the handler returns a 500 and Stripe retries later, which is exactly what you want for transient failures.
- Handle async payments. For delayed methods such as bank debits,
checkout.session.completedfires withpayment_statusstill"unpaid", and the money arrives later ascheckout.session.async_payment_succeeded. Calling the same function for both covers instant and delayed payments.
Route Handlers use the Node.js runtime by default, which the Stripe SDK supports fully. If you use proxy.ts to redirect signed-out users, make sure its matcher excludes /api/webhooks, since Stripe never has a session cookie.
Fulfilling Orders Idempotently
Webhooks can arrive more than once, and the customer may also hit the success page, which you may want to trigger fulfillment as a fallback. So fulfillment must be safe to run repeatedly for the same session.
// src/lib/fulfillment.ts
import "server-only";
import { stripe } from "@/lib/stripe";
import { db } from "@/lib/db";

export async function fulfillCheckout(sessionId: string) {
  const session = await stripe.checkout.sessions.retrieve(sessionId, {
    expand: ["line_items"],
  });

  if (session.payment_status === "unpaid") {
    // Async payment still pending; a later event will call this again.
    return;
  }

  // Unique constraint on stripe_session_id makes this a no-op on repeats.
  const inserted = await db.order.createIfNotExists({
    stripeSessionId: session.id,
    userId: session.client_reference_id,
    email: session.customer_details?.email ?? null,
    productKey: session.metadata?.productKey ?? null,
    amountTotal: session.amount_total,
    currency: session.currency,
  });

  if (!inserted) return; // Already fulfilled.

  // Grant access, send the receipt or download email, etc.
}
db.order.createIfNotExists is a placeholder for your data layer. The essential part is a unique constraint on the Stripe session ID, enforced by the database rather than a "check then insert" in code, which can race when two webhook deliveries arrive at once. With Prisma or Drizzle that's an insert that ignores conflicts on a unique column; the post on Drizzle ORM with Next.js shows onConflictDoNothing for exactly this.
Retrieving the session from Stripe, rather than trusting the webhook payload's line items, gives you the latest state and lets you expand line_items, which aren't included in the event by default.
Keep the webhook handler fast. If fulfillment involves slow work, such as generating files or calling several APIs, record the order and hand the rest to a background job, so Stripe gets its response quickly and doesn't time out and retry.
Building the Success Page
The success page reads the session ID from the URL and shows a confirmation:
// src/app/checkout/success/page.tsx
import { redirect } from "next/navigation";
import { stripe } from "@/lib/stripe";

export default async function SuccessPage({
  searchParams,
}: {
  searchParams: Promise<{ session_id?: string }>;
}) {
  const { session_id: sessionId } = await searchParams;
  if (!sessionId) redirect("/pricing");

  const session = await stripe.checkout.sessions.retrieve(sessionId);

  if (session.status === "open") {
    // Customer came back without completing payment.
    redirect("/pricing");
  }

  const isPaid = session.payment_status !== "unpaid";

  return (
    <main>
      <h1>{isPaid ? "Thanks for your order!" : "Payment processing"}</h1>
      <p>
        {isPaid
          ? `A receipt is on its way to ${session.customer_details?.email}.`
          : "We'll email you as soon as your payment is confirmed."}
      </p>
    </main>
  );
}
searchParams is a promise in Next.js 16, so it's awaited before use. The page retrieves the session from Stripe rather than trusting the query string; the session ID is hard to guess, but it's still user input. Reading searchParams also makes the page render per request, which it must, since the result depends on the session.
Don't show sensitive details here. Anyone with the URL can view this page, so limit it to a confirmation message and the email it was sent to.
Testing Locally with the Stripe CLI
Stripe can't reach localhost, so the Stripe CLI forwards events to your dev server:
stripe login
stripe listen --forward-to localhost:3000/api/webhooks/stripe
stripe listen prints a webhook signing secret (whsec_...). Put that in STRIPE_WEBHOOK_SECRET in .env.local and restart next dev. It's different from the secret for your production endpoint.
Now go through checkout with Stripe's test cards:
4242 4242 4242 4242succeeds immediately.4000 0025 0000 3155requires 3D Secure authentication.4000 0000 0000 9995is declined for insufficient funds.
Any future expiry date and any CVC work. You can also fire events without going through the UI:
stripe trigger checkout.session.completed
Watch the terminal running stripe listen to see each event and the status code your handler returned.
Adding Subscriptions
Subscriptions use the same building blocks. Create a recurring price in the dashboard, then change the mode:
// src/app/billing/actions.ts
"use server";

import { redirect } from "next/navigation";
import { stripe } from "@/lib/stripe";
import { getCurrentUser } from "@/lib/auth";

export async function startSubscription() {
  const user = await getCurrentUser();
  if (!user) redirect("/login");

  const siteUrl = process.env.NEXT_PUBLIC_SITE_URL!;

  const session = await stripe.checkout.sessions.create({
    mode: "subscription",
    line_items: [
      { price: process.env.STRIPE_PRO_MONTHLY_PRICE_ID!, quantity: 1 },
    ],
    customer: user.stripeCustomerId ?? undefined,
    customer_email: user.stripeCustomerId ? undefined : user.email,
    client_reference_id: user.id,
    success_url: `${siteUrl}/billing?success=1`,
    cancel_url: `${siteUrl}/billing`,
  });

  redirect(session.url!);
}

export async function openBillingPortal() {
  const user = await getCurrentUser();
  if (!user?.stripeCustomerId) redirect("/billing");

  const portal = await stripe.billingPortal.sessions.create({
    customer: user.stripeCustomerId,
    return_url: `${process.env.NEXT_PUBLIC_SITE_URL}/billing`,
  });

  redirect(portal.url);
}
For existing customers you pass customer so the subscription attaches to the same Stripe customer; customer and customer_email can't both be set, hence the conditional. The customer portal is a Stripe-hosted page where users update cards, switch plans, download invoices, and cancel. Configure what it allows in the dashboard's billing portal settings, and you won't need to build any of that UI.
Subscriptions change over time, so your webhook needs a few more events:
| Event | What to do |
|---|---|
checkout.session.completed | Save the Stripe customer ID and subscription ID on the user |
customer.subscription.updated | Sync status (active, past_due, canceled) and the current plan |
customer.subscription.deleted | Remove access |
invoice.payment_failed | Warn the user; Stripe retries the charge automatically |
Store the subscription status in your database and check that, not Stripe, on each request. Calling the Stripe API on every page view is slow and burns through rate limits. Webhooks keep your copy in sync.
Security Checklist
Before you switch to live keys, go through this list:
- The secret key is only used in server code, enforced with
server-only. - Prices come from Stripe or a server-side catalog, never from form data.
- Every webhook request is verified with
constructEventusing the raw body. - Fulfillment is idempotent, backed by a unique constraint.
- Access is granted from webhook-driven database state, not from the success page URL.
- The production webhook endpoint subscribes only to events you handle, and uses its own signing secret.
- Server Actions that start checkout check authentication where your business rules require it. They're public endpoints, like any API route.
Conclusion
A solid Stripe integration in Next.js comes down to a clear division of labor. A Server Action creates the Checkout Session with server-defined prices and redirects. Stripe collects the payment. A Route Handler verifies the webhook signature and triggers fulfillment, which is idempotent and keyed on the session ID. The success page simply confirms what already happened.
Start with hosted Checkout in test mode, run through the test cards with stripe listen forwarding events, and make sure a duplicated webhook never creates a duplicate order. Once that's solid, subscriptions and the customer portal are a small step further.