
Integrating Next.js with Other Backend Technologies: Express, GraphQL, and Beyond
Next.js, a versatile React framework, is often used for building frontend applications. However, its flexibility extends beyond the frontend, allowing seamless integration with various backend technologies like Express and GraphQL. In this article, we'll explore how Next.js can be used with different backend technologies, providing in-depth explanations and code examples for integration.
Integrating Next.js with Express.js
Integrating Next.js with Express.js ( which is a popular Node.js framework) allows you to take advantage of Express's robust routing and middleware capabilities while utilizing Next.js for rendering your React components. This integration can be useful for adding custom backend functionality, such as API endpoints, middleware, or handling custom server-side logic.

Steps to Integrate Next.js with Express.js
Step 1: Setup Your Project
-
Create a new Next.js project:
npx create-next-app my-next-app cd my-next-app -
Install Express:
npm install express
Step 2: Create a Custom Server
-
Create a
server.jsfile in the root of your project:// server.js const express = require("express"); const next = require("next"); const dev = process.env.NODE_ENV !== "production"; const app = next({ dev }); const handle = app.getRequestHandler(); app.prepare().then(() => { const server = express(); // Custom route example server.get("/custom-route", (req, res) => { return app.render(req, res, "/custom", req.query); }); // Default handler server.all("*", (req, res) => { return handle(req, res); }); const PORT = process.env.PORT || 3000; server.listen(PORT, (err) => { if (err) throw err; console.log(`> Ready on http://localhost:${PORT}`); }); });
Step 3: Update Scripts in package.json
-
Modify the
startscript to use the custom server:"scripts": { "dev": "next dev", "build": "next build", "start": "node server.js" }
Step 4: Create Custom Routes and Middleware
-
You can now add custom routes and middleware in
server.js:// server.js const express = require("express"); const next = require("next"); const dev = process.env.NODE_ENV !== "production"; const app = next({ dev }); const handle = app.getRequestHandler(); app.prepare().then(() => { const server = express(); // Example middleware server.use((req, res, next) => { console.log("Request URL:", req.url); next(); }); // Custom API endpoint server.get("/api/custom", (req, res) => { res.json({ message: "This is a custom API endpoint" }); }); // Custom route example server.get("/custom-route", (req, res) => { return app.render(req, res, "/custom", req.query); }); // Default handler server.all("*", (req, res) => { return handle(req, res); }); const PORT = process.env.PORT || 3000; server.listen(PORT, (err) => { if (err) throw err; console.log(`> Ready on http://localhost:${PORT}`); }); });
Step 5: Create a Custom Page
-
Create a custom page in the
pagesdirectory (e.g.,pages/custom.js):// pages/custom.js const Custom = () => { return ( <div> <h1>Custom Route Page</h1> <p>This is a custom route handled by Express.js</p> </div> ); }; export default Custom;
Step 6: Run Your Application
-
Start the development server:
npm run dev -
Access your custom route at
http://localhost:3000/custom-route.
Benefits of Integrating Next.js with Express.js

Custom Routing
- Flexibility: Define custom routes and handle specific requests that are not directly related to Next.js pages.
- Advanced Patterns: Use Express's powerful routing capabilities to implement complex URL patterns and parameters.
Middleware
- Custom Middleware: Implement middleware for tasks like logging, authentication, rate limiting, and more.
- Third-Party middleware: Leverage the extensive ecosystem of Express middleware for additional functionality.
API Endpoints
- Custom APIs: Create custom API endpoints using Express to handle backend logic and data processing.
- Integration: Integrate with databases, third-party services, and other backend systems.
Unified Server
- Single Server: Run both your frontend (Next.js) and backend (Express) on a single server for a more straightforward deployment process.
- Consistent Environment: Ensure that your frontend and backend share the same environment and configurations.
Integrating Next.js with GraphQL
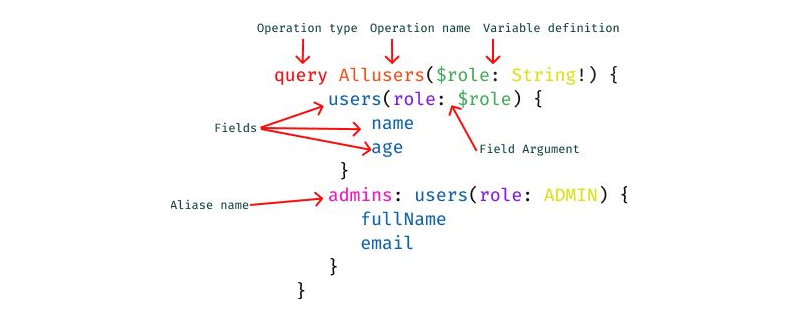
Integrating Next.js with GraphQL can enhance your application by enabling efficient data fetching, strong typing, and powerful querying capabilities. This integration is typically done using a GraphQL client like Apollo Client, which simplifies the process of fetching data from a GraphQL API and managing application state. GraphQL is a query language for APIs that allows client to request only data they need.
Install GraphQL Dependencies: Install necessary dependencies for GraphQL integration.
Steps to Integrate Next.js with GraphQL
Step-1: Setup Your Project
-
Create a new Next.js project if you don't have one already:
npx create-next-app my-next-app cd my-next-app -
Install Apollo Client and GraphQL:
npm install @apollo/client graphql
Step-2: Set Up Apollo Client
-
Create a new file
lib/apolloClient.jsto configure Apollo Client:// lib/apolloClient.js import { ApolloClient, InMemoryCache, HttpLink } from "@apollo/client"; const client = new ApolloClient({ link: new HttpLink({ uri: "https://your-graphql-endpoint.com/graphql", // Replace with your GraphQL endpoint }), cache: new InMemoryCache(), }); export default client;
Step-3: Use Apollo Provider
-
Wrap your application with the ApolloProvider in
_app.js:// pages/_app.js import { ApolloProvider } from "@apollo/client"; import client from "../lib/apolloClient"; function MyApp({ Component, pageProps }) { return ( <ApolloProvider client={client}> <Component {...pageProps} /> </ApolloProvider> ); } export default MyApp;
Step-4: Create GraphQL Queries
-
Create a GraphQL query to fetch data. For example, let's create a query to fetch posts:
// queries/posts.js
import { gql } from "@apollo/client";

export const GET_POSTS = gql`
  query GetPosts {
    posts {
      id
      title
      content
    }
  }
`;
Step-5: Fetch Data in a Component
-
Use the
useQueryhook from Apollo Client to fetch data in a Next.js page or component:// pages/index.js import { useQuery } from "@apollo/client"; import { GET_POSTS } from "../queries/posts"; const Home = () => { const { loading, error, data } = useQuery(GET_POSTS); if (loading) return <p>Loading...</p>; if (error) return <p>Error: {error.message}</p>; return ( <div> <h1>Posts</h1> <ul> {data.posts.map((post) => ( <li key={post.id}> <h2>{post.title}</h2> <p>{post.content}</p> </li> ))} </ul> </div> ); }; export default Home;
Advanced Usage
Server-Side Rendering with Apollo Client
Next.js supports server-side rendering (SSR) out of the box, and you can leverage this capability with Apollo Client.
-
Modify
lib/apolloClient.jsto support SSR:// lib/apolloClient.js import { ApolloClient, InMemoryCache, HttpLink } from "@apollo/client"; import { setContext } from "@apollo/client/link/context"; import { onError } from "@apollo/client/link/error"; import fetch from "isomorphic-unfetch"; const httpLink = new HttpLink({ uri: "https://your-graphql-endpoint.com/graphql", // Replace with your GraphQL endpoint fetch, }); const authLink = setContext((_, { headers }) => { // get the authentication token from local storage if it exists const token = localStorage.getItem("token"); // return the headers to the context so httpLink can read them return { headers: { ...headers, authorization: token ? `Bearer ${token}` : "", }, }; }); const errorLink = onError(({ graphQLErrors, networkError }) => { if (graphQLErrors) { graphQLErrors.forEach(({ message, locations, path }) => console.log( `[GraphQL error]: Message: ${message}, Location: ${locations}, Path: ${path}`, ), ); } if (networkError) { console.log(`[Network error]: ${networkError}`); } }); const link = authLink.concat(errorLink).concat(httpLink); export const createApolloClient = () => { return new ApolloClient({ ssrMode: typeof window === "undefined", link, cache: new InMemoryCache(), }); }; -
Use Apollo Client with SSR in
_app.js:// pages/_app.js import { ApolloProvider } from "@apollo/client"; import { useApollo } from "../lib/apolloClient"; function MyApp({ Component, pageProps }) { const apolloClient = useApollo(pageProps.initialApolloState); return ( <ApolloProvider client={apolloClient}> <Component {...pageProps} /> </ApolloProvider> ); } export default MyApp; -
Create
lib/apolloClient.jsto initialize Apollo Client for SSR:// lib/apolloClient.js import { useMemo } from "react"; import { ApolloClient, InMemoryCache } from "@apollo/client"; let apolloClient; function createIsomorphLink() { if (typeof window === "undefined") { const { SchemaLink } = require("@apollo/client/link/schema"); const { schema } = require("./schema"); return new SchemaLink({ schema }); } else { const { HttpLink } = require("@apollo/client/link/http"); return new HttpLink({ uri: "/api/graphql", credentials: "same-origin", }); } } function createApolloClient() { return new ApolloClient({ ssrMode: typeof window === "undefined", link: createIsomorphLink(), cache: new InMemoryCache(), }); } export function initializeApollo(initialState = null) { const _apolloClient = apolloClient ?? createApolloClient(); // If your page has Next.js data fetching methods that use Apollo Client, the initial state // gets hydrated here if (initialState) { // Get existing cache, loaded during client side data fetching const existingCache = _apolloClient.extract(); // Restore the cache using the data passed from getStaticProps/getServerSideProps // combined with the existing cached data _apolloClient.cache.restore({ ...existingCache, ...initialState }); } // For SSG and SSR always create a new Apollo Client if (typeof window === "undefined") return _apolloClient; // Create the Apollo Client once in the client if (!apolloClient) apolloClient = _apolloClient; return _apolloClient; } export function useApollo(initialState) { const store = useMemo(() => initializeApollo(initialState), [initialState]); return store; }
Benefits of Integrating Next.js with GraphQL
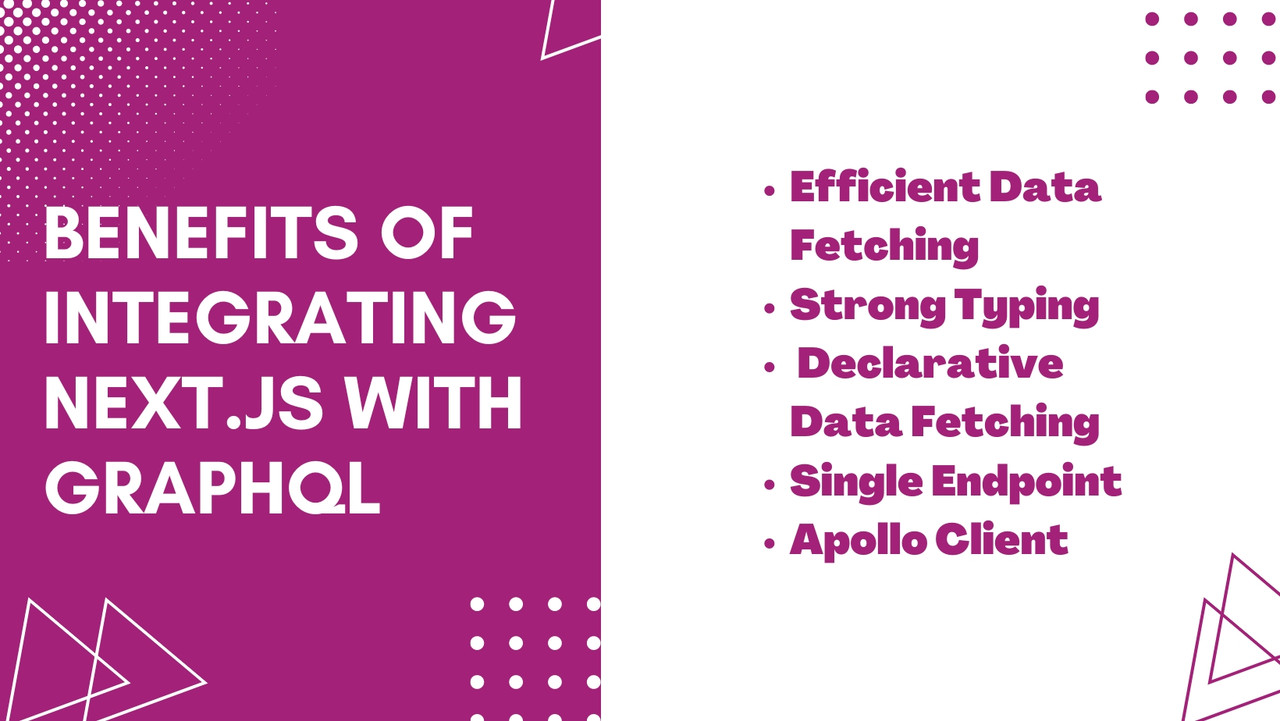
Efficient Data Fetching
- Reduced Overfetching: Fetch only the data you need with GraphQL's flexible querying.
- Optimized Requests: Combine multiple resources into a single request.
Strong Typing
- Schema Definition: Define a strong, well-typed schema that helps in understanding and maintaining the API.
- Type Safety: Ensures type safety and reduces runtime errors.
Declarative Data Fetching
- Intuitive Queries: Write declarative queries that are easy to understand and maintain.
- Real-Time Updates: Utilize subscriptions for real-time data updates.
Single Endpoint
- Simplified API: Access all data through a single endpoint, reducing the complexity of multiple REST endpoints.
- API Evolution: Evolve your API without breaking existing queries.
Integration with Apollo Client
- State Management: Manage both local and remote state with Apollo Client.
- Developer Tools: Leverage Apollo DevTools for debugging and inspecting queries.
By choosing the appropriate backend technology stack based on your project requirements and preferences, you can create robust and efficient full-stack web applications using Next.js.
Integrating Next.js with Firebase
Integrating Next.js with Firebase can significantly enhance your application by providing robust backend services such as real-time databases, authentication, hosting, and serverless functions. Firebase offers a serverless backend architecture that is particularly beneficial for building scalable and efficient web applications.

Steps to Integrate Next.js with Firebase
Step1: Setup Your Project
-
Create a new Next.js project if you don't have one already:
npx create-next-app my-next-app cd my-next-app -
Install Firebase:
npm install firebase
Step2: Configure Firebase
-
Create a Firebase project in the Firebase Console.
-
Add a web app to your Firebase project and copy the Firebase configuration.
-
Create a
firebaseConfig.jsfile in the root of your Next.js project and paste the Firebase configuration:// firebaseConfig.js const firebaseConfig = { apiKey: "YOUR_API_KEY", authDomain: "YOUR_AUTH_DOMAIN", projectId: "YOUR_PROJECT_ID", storageBucket: "YOUR_STORAGE_BUCKET", messagingSenderId: "YOUR_MESSAGING_SENDER_ID", appId: "YOUR_APP_ID", }; export default firebaseConfig;
Step3: Initialize Firebase
-
Create a
firebase.jsfile to initialize Firebase:// firebase.js import firebase from "firebase/app"; import "firebase/auth"; import "firebase/firestore"; import firebaseConfig from "./firebaseConfig"; if (!firebase.apps.length) { firebase.initializeApp(firebaseConfig); } export const auth = firebase.auth(); export const firestore = firebase.firestore(); export default firebase;
Step4: Use Firebase in Next.js Components
-
Implement Firebase Authentication in a Next.js component:
// pages/login.js import { useState } from "react"; import { auth } from "../firebase"; const Login = () => { const [email, setEmail] = useState(""); const [password, setPassword] = useState(""); const handleLogin = async (e) => { e.preventDefault(); try { await auth.signInWithEmailAndPassword(email, password); alert("Logged in successfully"); } catch (error) { alert(error.message); } }; return ( <div> <h1>Login</h1> <form onSubmit={handleLogin}> <input type="email" value={email} onChange={(e) => setEmail(e.target.value)} placeholder="Email" required /> <input type="password" value={password} onChange={(e) => setPassword(e.target.value)} placeholder="Password" required /> <button type="submit">Login</button> </form> </div> ); }; export default Login; -
Fetch data from Firestore in a Next.js component:
// pages/posts.js
import { useEffect, useState } from "react";
import { firestore } from "../firebase";

const Posts = () => {
  const [posts, setPosts] = useState([]);

  useEffect(() => {
    const fetchPosts = async () => {
      const postsCollection = await firestore.collection("posts").get();
      setPosts(postsCollection.docs.map((doc) => doc.data()));
    };

    fetchPosts();
  }, []);

  return (
    <div>
      <h1>Posts</h1>
      <ul>
        {posts.map((post, index) => (
          <li key={index}>
            <h2>{post.title}</h2>
            <p>{post.content}</p>
          </li>
        ))}
      </ul>
    </div>
  );
};

export default Posts;
Step5: Deploying to Firebase Hosting
-
Install Firebase CLI:
npm install -g firebase-tools -
Initialize Firebase in your project:
firebase init -
Follow the prompts to configure Firebase Hosting, selecting your Firebase project and specifying the
outdirectory as the public directory. -
Build your Next.js project:
npm run build npm run export -
Deploy your Next.js project to Firebase Hosting:
firebase deploy
Benefits of Integrating Next.js with Firebase
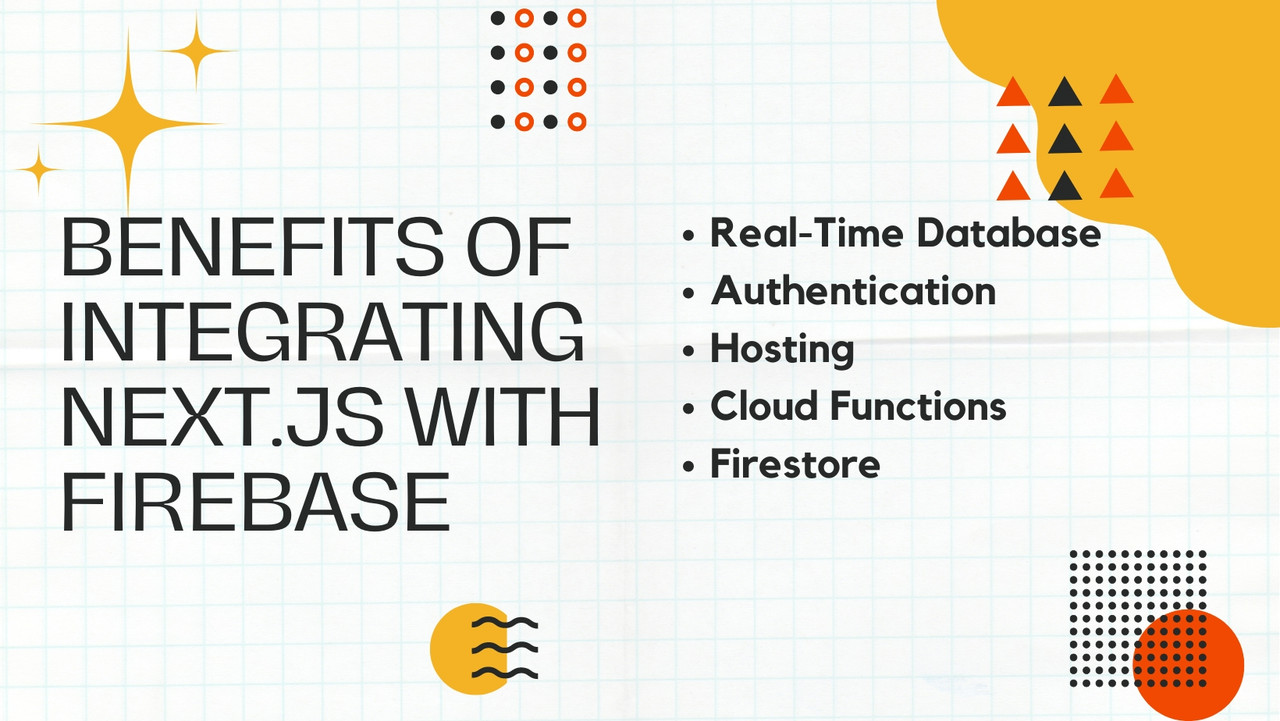
Real-Time Database
- Instant Updates: Firebase's real-time database provides instant data updates across all clients.
- Sync Data: Easily synchronize data in real-time without complex backend code.
Authentication
- Multiple Providers: Supports various authentication methods, including email/password, Google, Facebook, Twitter, and more.
- Secure and Scalable: Provides a secure and scalable authentication solution out-of-the-box.
Hosting
- Global CDN: Firebase Hosting offers fast and secure hosting with a global content delivery network (CDN).
- Easy Deployment: Simplifies the deployment process with a single command.
Cloud Functions
- Serverless: Write and deploy serverless functions that automatically scale.
- Custom Logic: Implement custom backend logic, such as data processing and integration with third-party services.
Firestore
- Flexible and Scalable: Firestore offers a flexible, scalable, and serverless NoSQL database solution.
- Complex Queries: Supports complex queries and real-time data synchronization.
Nextjs FAQ
Yes, Next.js can be integrated with a wide range of backend technologies apart from Express.js and GraphQL. Some other popular options include:
-
Django: Next.js can be used as the frontend framework with Django serving as the backend for handling data storage, authentication, and other server-side logic.
-
Spring Boot: Next.js can be integrated with Spring Boot to build full-stack Java-based web applications, with Next.js handling the frontend and Spring Boot powering the backend RESTful APIs.
-
Firebase: Next.js can be combined with Firebase for serverless backend services, including authentication, real-time database, and cloud functions, providing a scalable and easy-to-use backend infrastructure.
Using Apollo Server with Next.js for GraphQL integration offers several advantages:
- Simplicity: Apollo Server is easy to set up and configure, making it straightforward to create a GraphQL API endpoint in a Next.js app.
- Flexibility: Apollo Server provides a flexible data fetching and caching layer, allowing you to customize data fetching logic and optimize performance.
- Tooling: Apollo Server integrates seamlessly with Apollo Client, providing a complete GraphQL solution for frontend and backend development.
- Community Support: Apollo Server is backed by a vibrant community and extensive documentation, making it easy to find resources and get help when needed.
Yes, you can use GraphQL for server-side rendering (SSR) with Next.js. Next.js provides support for server-side rendering through its getServerSideProps function, which allows you to fetch data from a GraphQL server and pre-render pages on the server before sending them to the client. This approach enables efficient data fetching and SEO-friendly rendering of dynamic content.
Integrating Next.js with an Express server allows you to leverage Express middleware and custom routing. You can set up an Express server and use Next.js as a middleware to handle the rendering of pages.
Implementation:
const express = require("express");
const next = require("next");

const dev = process.env.NODE_ENV !== "production";
const app = next({ dev });
const handle = app.getRequestHandler();

app.prepare().then(() => {
  const server = express();

  server.get("/custom-route", (req, res) => {
    return app.render(req, res, "/custom", req.query);
  });

  server.all("*", (req, res) => {
    return handle(req, res);
  });

  server.listen(3000, (err) => {
    if (err) throw err;
    console.log("> Ready on http://localhost:3000");
  });
});
Benefits:
- Custom Middleware: Implement authentication, logging, and other middleware.
- Flexible Routing: Define custom routes and handle them as needed.
Integrating GraphQL with Next.js can be done using Apollo Client for data fetching. This involves setting up Apollo Client and creating GraphQL queries to fetch data.
Implementation:
-
Install Dependencies:
npm install @apollo/client graphql -
Setup Apollo Client:
// lib/apolloClient.js import { ApolloClient, InMemoryCache, HttpLink } from "@apollo/client"; const client = new ApolloClient({ link: new HttpLink({ uri: "https://your-graphql-endpoint.com/graphql" }), cache: new InMemoryCache(), }); export default client; -
Use Apollo Client in Pages:
// pages/index.js
import { ApolloProvider, gql, useQuery } from "@apollo/client";
import client from "../lib/apolloClient";

const GET_POSTS = gql`
  query GetPosts {
    posts {
      id
      title
      content
    }
  }
`;

const Home = () => {
  const { loading, error, data } = useQuery(GET_POSTS);

  if (loading) return <p>Loading...</p>;
  if (error) return <p>Error: {error.message}</p>;

  return (
    <div>
      <h1>Posts</h1>
      <ul>
        {data.posts.map((post) => (
          <li key={post.id}>{post.title}</li>
        ))}
      </ul>
    </div>
  );
};

const App = () => (
  <ApolloProvider client={client}>
    <Home />
  </ApolloProvider>
);

export default App;
Best Practices:
- Caching: Use Apollo's cache for efficient data management.
- Error Handling: Implement robust error handling for network and GraphQL errors.
- Code Splitting: Dynamically import components to reduce the initial load time.
Handling authentication involves using middleware for protected routes and tokens for verifying user identity. You can use libraries like next-auth for simplified integration.
Implementation:
-
Install
next-auth:npm install next-auth -
Setup Authentication Providers:
// pages/api/auth/[...nextauth].js import NextAuth from "next-auth"; import Providers from "next-auth/providers"; export default NextAuth({ providers: [ Providers.Google({ clientId: process.env.GOOGLE_ID, clientSecret: process.env.GOOGLE_SECRET, }), ], database: process.env.DATABASE_URL, }); -
Use Session in Components:
// pages/index.js
import { useSession, signIn, signOut } from "next-auth/client";

const Home = () => {
  const [session, loading] = useSession();

  if (loading) return <p>Loading...</p>;

  return (
    <div>
      {!session ? (
        <button onClick={signIn}>Sign In</button>
      ) : (
        <>
          <p>Signed in as {session.user.email}</p>
          <button onClick={signOut}>Sign Out</button>
        </>
      )}
    </div>
  );
};

export default Home;
Benefits:
- Easy Integration: Simplifies authentication with various providers.
- Session Management: Handles session management and JWT tokens.
Next.js API Routes allow you to create serverless functions that can interact with external APIs or backend services. This enables you to handle server-side logic directly within your Next.js application.
Implementation:
-
Create an API Route:
// pages/api/data.js export default async (req, res) => { const response = await fetch("https://api.example.com/data"); const data = await response.json(); res.status(200).json(data); }; -
Fetch Data from API Route in Components:
// pages/index.js
import useSWR from "swr";

const fetcher = (url) => fetch(url).then((res) => res.json());

const Home = () => {
  const { data, error } = useSWR("/api/data", fetcher);

  if (error) return <div>Failed to load</div>;
  if (!data) return <div>Loading...</div>;

  return (
    <div>
      <h1>Data from API</h1>
      <pre>{JSON.stringify(data, null, 2)}</pre>
    </div>
  );
};

export default Home;
Benefits:
- Serverless Architecture: Simplifies deployment and scaling.
- Seamless Integration: Easily connect with external APIs and services.
Handling real-time data involves managing data synchronization between the client and server. Solutions include using WebSockets, GraphQL subscriptions, or libraries like Apollo for real-time updates.
Challenges and Solutions:
- Data Consistency: Ensure the client state is in sync with the server by using Apollo Client’s subscription support.
- Scalability: WebSockets can be resource-intensive. Use managed services like AWS AppSync or GraphQL subscriptions with serverless architecture.
- Latency: Minimize latency by deploying your Next.js application and backend services close to your users using CDNs and edge functions.
Implementation Example:
// lib/apolloClient.js
import { ApolloClient, InMemoryCache, HttpLink, split } from "@apollo/client";
import { WebSocketLink } from "@apollo/client/link/ws";
import { getMainDefinition } from "@apollo/client/utilities";

const httpLink = new HttpLink({
  uri: "https://your-graphql-endpoint.com/graphql",
});

const wsLink = new WebSocketLink({
  uri: "wss://your-graphql-endpoint.com/graphql",
  options: {
    reconnect: true,
  },
});

const splitLink = split(
  ({ query }) => {
    const definition = getMainDefinition(query);
    return (
      definition.kind === "OperationDefinition" &&
      definition.operation === "subscription"
    );
  },
  wsLink,
  httpLink,
);

const client = new ApolloClient({
  link: splitLink,
  cache: new InMemoryCache(),
});

export default client;
Example Subscription:
// pages/index.js
import { ApolloProvider, gql, useSubscription } from "@apollo/client";
import client from "../lib/apolloClient";

const SUBSCRIBE_TO_UPDATES = gql`
  subscription OnUpdate {
    update {
      id
      content
    }
  }
`;

const Home = () => {
  const { data, loading, error } = useSubscription(SUBSCRIBE_TO_UPDATES);

  if (loading) return <p>Loading...</p>;
  if (error) return <p>Error: {error.message}</p>;

  return (
    <div>
      <h1>Real-time Updates</h1>
      {data.update && <p>{data.update.content}</p>}
    </div>
  );
};

const App = () => (
  <ApolloProvider client={client}>
    <Home />
  </ApolloProvider>
);

export default App;
Benefits:
- Real-Time Updates: Keeps the UI in sync with real-time data changes.
- Scalable Solutions: Using managed services and subscriptions ensures scalability and reliability.
Conclusion
Next.js can be seamlessly integrated with various backend technologies, including Express.js and GraphQL, allowing you to build full-stack web applications with ease. By combining Next.js for frontend development with your preferred backend stack, you can create powerful, data-driven applications that leverage the strengths of both frontend and backend technologies. Whether you're building RESTful APIs with Express or implementing a GraphQL server, Next.js provides the flexibility and versatility to meet your project requirements. With the examples and explanations provided, you can confidently integrate Next.js with your chosen backend technology stack and build scalable, feature-rich web applications.


